

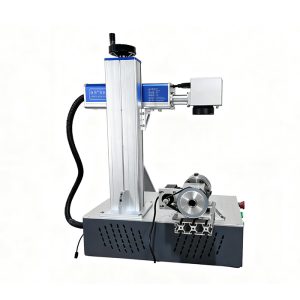
The rotary axis for fiber laser marking machine is a key component used to realize rotary positioning and marking of workpieces. Correct installation of the rotary axis guarantees equipment stability and marking precision. The installation procedures for the rotary axis of a fiber laser marking machine are introduced as follows:
1. Preparations
Before installing the rotary axis, inspect the whole equipment first to confirm there is no damage or malfunction. Meanwhile, get all required tools and installation accessories ready, such as screwdrivers, nuts and gaskets.
2. Confirm the Installation Position
Select a proper installation position according to actual production demands and marking range. Normally, the rotary axis shall be mounted close to the fiber laser marking machine to keep connecting cables short and direct.
3. Fix the Base
Place the rotary axis base on the selected position, and fasten it onto the worktable or platform with screws. Make sure the base is stable and firm, free from loosening caused by vibration during equipment operation.
4. Mount the Rotary Axis Body
Connect the rotary axis to its base. The bottom of the rotary axis is generally equipped with matching connectors or fixing holes for direct assembly with the base. Tighten all joints between the rotary axis and base to eliminate shaking or loosening.
5. Connect Power Cables and Signal Wires
Connect the power cable and signal wire of the rotary axis to corresponding ports in accordance with equipment specifications. Double-check correct wiring and tight plug connections. Before wiring, test the cables with a multimeter to ensure stable power supply and normal signal transmission.
6. Adjust the Rotary Axis Position
Complete position adjustment after mechanical assembly. Tune the mounting position and angle of the rotary axis to align it with the laser optical path. Ensure the moving direction of the rotary axis matches the marking direction of the fiber laser marking machine, so as to avoid marking defects resulting from misalignment.
7. Trial Operation
Carry out trial running after installation and alignment to verify the overall installation performance. Simulate actual marking processes to check whether the rotary axis runs smoothly and accurately, and inspect the precision and quality of marking results. If any defects or substandard performance are found, re-adjust and rectify until the expected effect is achieved.