

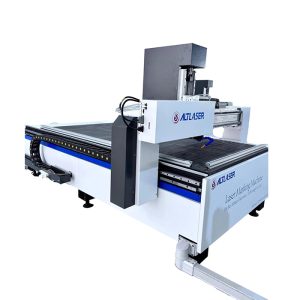
To adjust the optical path of the mirror laser sandblasting machine, follow the step-by-step alignment procedures. The complete operation steps are as follows:
1.Align the laser tube and the first reflector
Attach multiple layers of masking tape to the adjusting bracket of the first reflector. Fire short laser pulses to mark the spot position. Adjust the height and horizontal position of the laser tube so that the laser spot lands exactly at the center of the first reflector. Ensure the laser tube is parallel to the X-axis beam, and the laser outlet is aimed at the center of the reflector.
2.Align the first reflector
Paste multiple layers of masking tape on the adjusting bracket of the second reflector. Move the second reflector to its nearest position relative to the first reflector, then fire short pulses to mark the spot.
Next, move the second reflector to its farthest position, remove the masking tape and check the spot deviation between the two positions.
Adjust the reflector nuts according to the deviation: adjust Nut 1 for vertical deviation (turn clockwise to move the spot down); adjust Nut 2 for horizontal deviation; adjust Nut 3 for diagonal deviation (turn clockwise to move the spot upward and left, turn counterclockwise to move it downward and right). Repeat pulse testing and comparison after each minor adjustment until the spots from the near and far positions fully coincide.
3.Align the second reflector
Attach multiple layers of masking tape to the light inlet of the third reflector (inside the laser head). Move the laser head to the nearest position from the second reflector and mark the spot with short laser pulses, then move it to the farthest position and mark again.
Adopt the same adjustment method used for the first reflector. Fine-tune the angle of the second reflector repeatedly until the near and far laser spots are completely aligned.
4.Coaxial alignment of the nozzle center
Disconnect the air pipe, then remove the nozzle and focusing lens barrel. Reinstall all components after confirming the optical path is aligned. Finally, stick transparent tape on the nozzle. Fire low-power laser pulses and make fine adjustments until the laser spot is precisely centered on the nozzle marked on the tape. The adjustment is then completed.
5.Safety precautions
Wear laser goggles throughout the operation. Never look directly at the laser beam. Use white paper to assist in checking the spot position and avoid laser burns to the skin.
Make only small adjustments at all times. Do not move optical components over a large range, which may cause greater deviation.
Do not use hard objects to scratch the lens surfaces when cleaning the machine lenses. Never use high-power laser pulses, as this may burn through the tape and contaminate the lenses.